In this tutorial I will teach you how to create a 3D equalizer wallpaper in Cinema4D and Adobe Photoshop, you will learn different techniques as Cloner Object, Mograph Random Effector, Explode Objects, GI Renders and basic things of Photoshop. The tutorial is quite easy to follow and you can learn a lot of things from it.
Resources
- HDRi Pack 1 by zbyg (Creative Commons Share Alike)
- Micro Patterns by basstar (Creative Commons Share Alike)
Preview

Step 1: Create a cube
Open Cinema 4D and create a cube (Objects>Primitive>Cube) with dimensions x=37m y=466m z=38m and add a fillet with settings: Filet Radius= 3.5m and Fillet Subdivision=3.
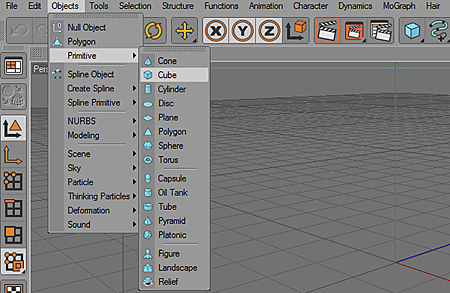
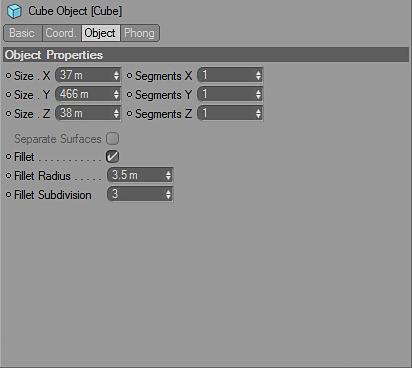
Step 2: Multiply the created cube
Now is time to multiply the created cube. Go to Mograph>Cloner Object, then put the created cube inside of it (drag the cube inside of cloner object).
Click on Cloner Object in object manager and put these settings:
Mode: Linear, Count: 102, Amount: 100%, X=40m, Y=0 and Z=0.
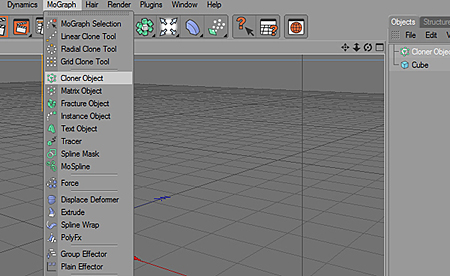
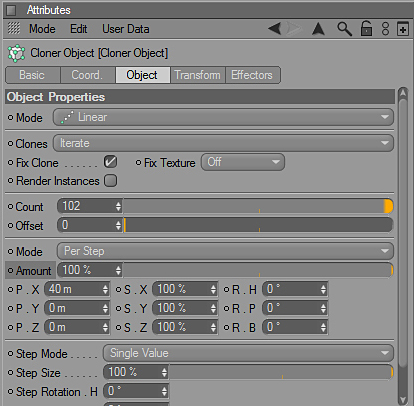
Step 3: Make the equalizer
With Cloner Object selected in object manager, go to Mograph>Random Effector and put there settings: Effector>Strength: 100%, Random Mode: Random, Seed: 12345
Parameter>Transform Mode: Relative, Transform Space: Node, select Position and Scale.
Now for the Position settings: X=0m, Y=110m, Z=0.
Scale settings: X=0, Y= -0.5, Z=0 and deselect Uniform and Absolute Scale if are selected.
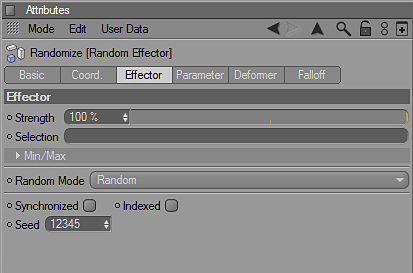
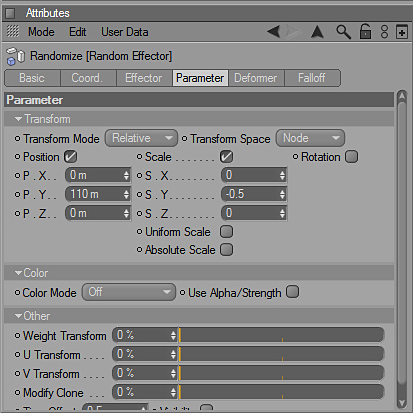
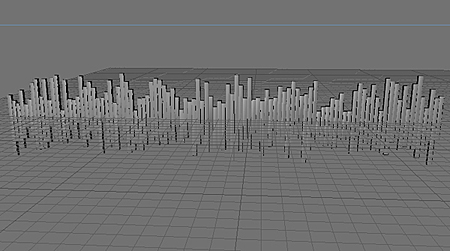
Your equalizer is still in “construction” but it should look like this now:
Step 4: Make the equalizer second part
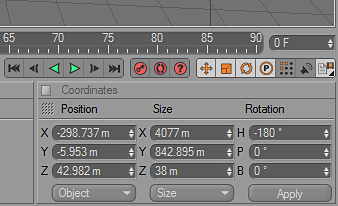
Select Cloner Object and duplicate it. In Coordinates panel put -180 degrees on Rotation H, then click apply. Now at the Position coordinates: X= -298.737 m, Y= -5.953 m, Z= 42.982 m.
Step 5: Make the shatter effect
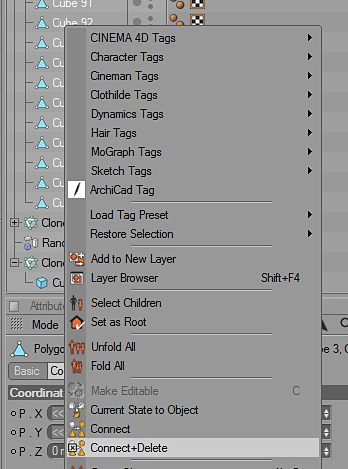
This is an optional step. Duplicate again the Cloner Object as in the Step 4. Make “Cloner Object.2” Editable (press C on the keyboard). Now if you unfold the group you should have 101 cubes, select all and make them editable too (C), press secondary-click and click on Connect+Delete.
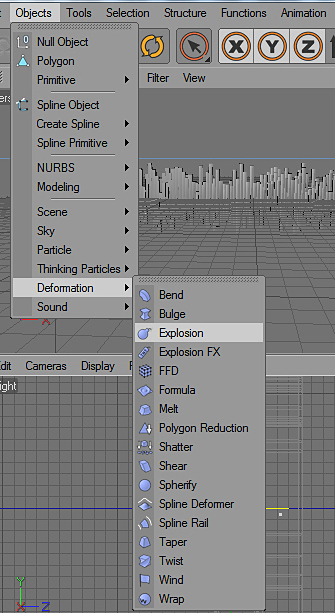
Now go to Objects>Deformation>Explosion and put the explosion under the cube created with Connect+Delete, and set this settings to the Explosion object.
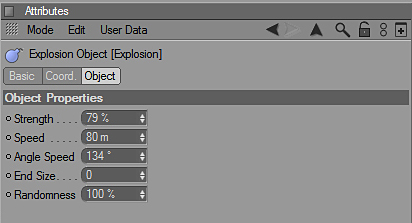
Strength: 79%, Speed: 80m, Angle Speed: 134 degrees, End Size: 0, Randomness: 100%.
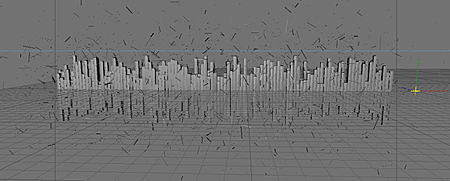
Select the cube and co to coordinates and at the Position put X=202m. The equalizer should look like this now. All we have to do now in Cinema 4D is materials, environment and render settings.
Step 6: Environment
Create a Sky object (Object>Scene>Sky), secondary-click on the sky select Cinema4D Tags> Composting and deselect “Seen by Camera”. After that create a new material (File>New Material) and edit it.
Deselect Color and Specular and select Luminance. On Luminance select the “studio007.hdr” from resources. Now drag and drop the material on the Sky object.
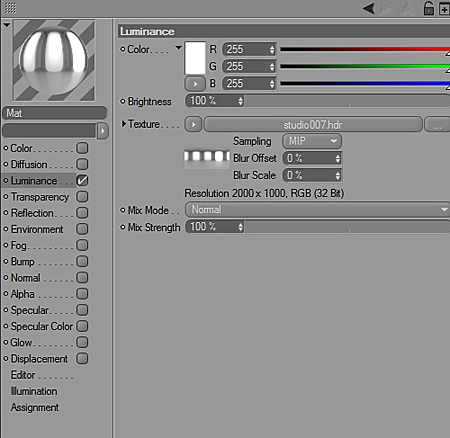
Step 7: Materials
Create a new material (File>New Material) and edit with these settings:
Color: 250,255,0 Brightness 113%
Reflection: Brightness 1%, Texture: Fresnel (select from the dropdown list)
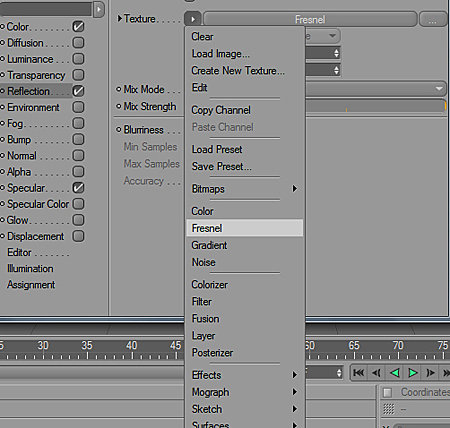
Specular: Mode: Plastic, Width: 50%, Height:25%, Falloff: 0%, Inner Width: 0%
Now drag and drop the material to front cubes.
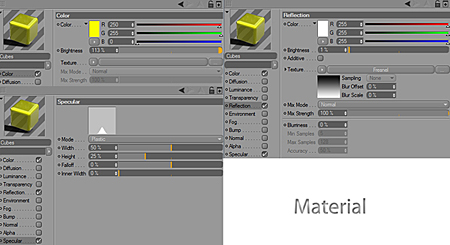
For the cubes in the back material, duplicate the material created above and change the color to: 255,54,54 and drag and drop it to the back cubes.
If you created the shatter effect pun the material 2 to the shattered cubes.
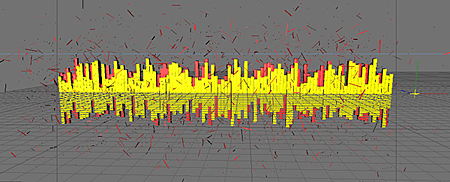
Step 8: Render Settings
Now we must go to Render>Render Settings (Ctrl+B)
Output: 2560×1600
Check Save, and select where you want the file to be saved. Check Alpha Channel.
Go to Anti-Aliasing and put Best, click on Effect and select Global Illumination.
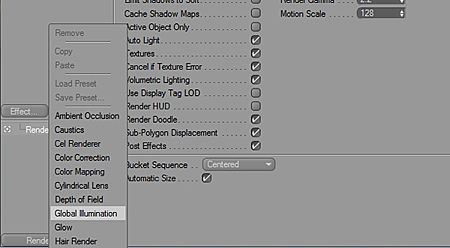
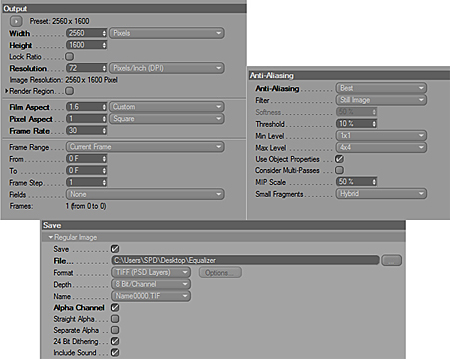
Now press Render To Picture Viewer and wait till the render is finished.
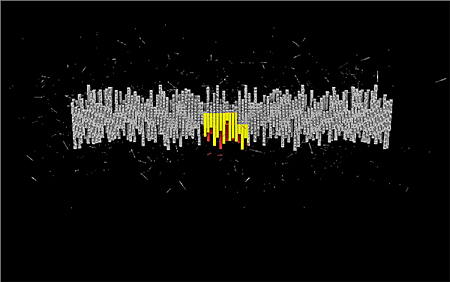
Step 9: Create render background (Photoshop)
Open Adobe Photoshop and create a new 2560×1600 document.
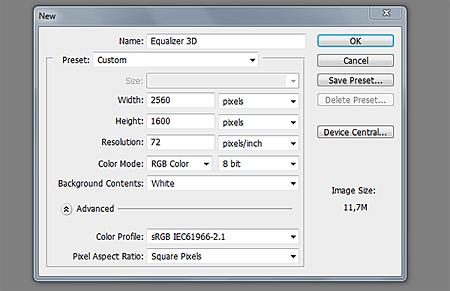
Select Gradient Tool (G) then put the gradient mode on radial and edit the colors: put foreground color #09101b and background color #202731.
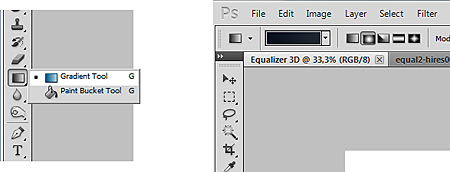
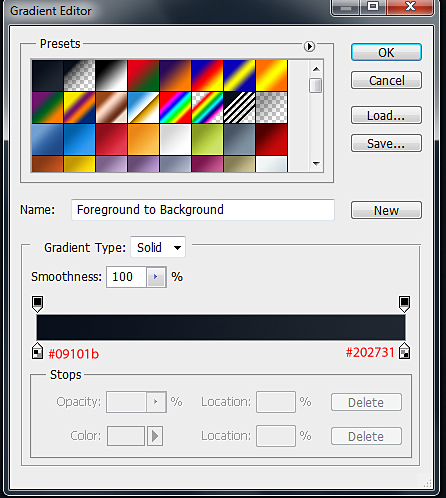
From the middle of document make a straight line (hold shift button) to the margins. You should have this now.

Step 10: Put background pattern
Create a new layer (Shift + Cmd/Ctrl + N) and fill it with black color, put the blend mode on soft light and lower the opacity to 47 percent.
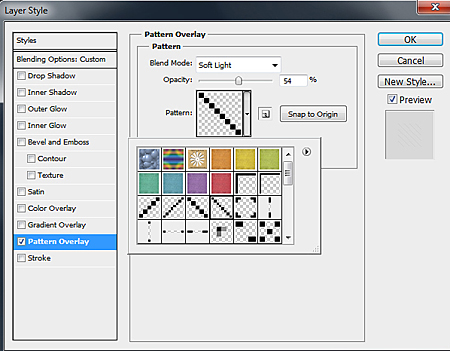
We need to put the pattern on the background. Double-click on the layer’s thumbnail in the Layers Panel to open the Layer Styles dialog box. Go to pattern select the provided pattern (scan B left). Now modify the pattern blend mode to Soft Light and lower the opacity to 54 percent.
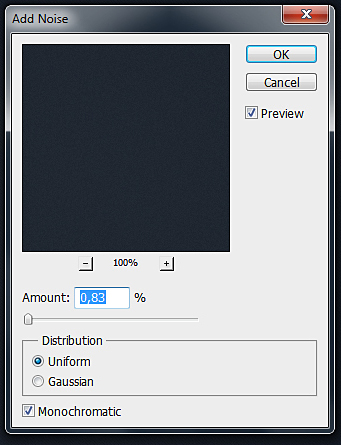
For a grunge effect you can add noise to the background layer: Filter>Noise>Add Noise and put this settings: Amount: 0, 83 percent, Distribution: Uniform and check Monochromatic. Your background should look like this now.

Step 11: Put the rendered Equalizer on created background
Open the PSD of render created in Cinema 4D and duplicate Background Layer. Go to Channels Ctrl+Click on Alpha Channel preview picture to select only the equalizer.
Select Magic Wand Tool (W) and secondary-click on the image Select Inverse and press Delete on the keyboard.
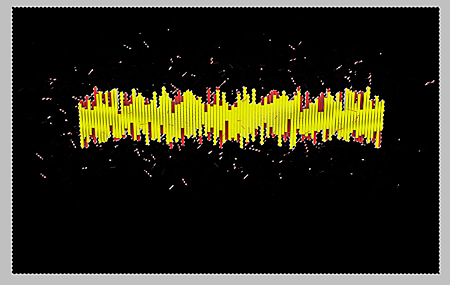
Now drag and drop the equalizer render with transparent background to the photoshop file created earlier.
Step 12: Create blurred background and adjustments
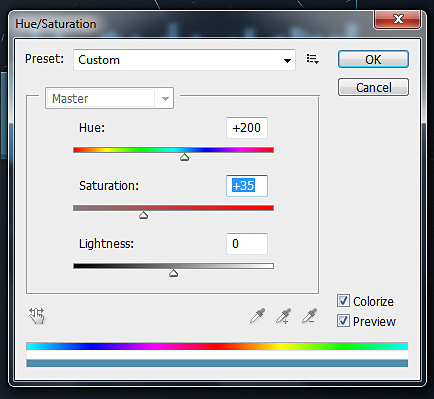
Duplicate the Cinema 4D created render and go to Image>Adjustments>Hue and Saturation (Ctrl+U) and check Colorize.
Hue: 200, Saturation: 35, Lightness: 0
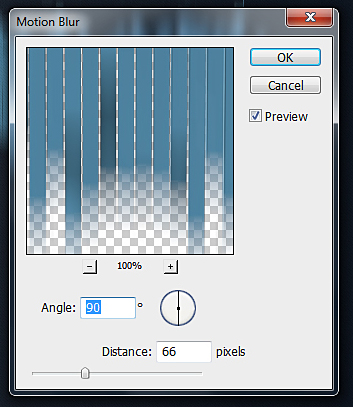
Go to Filter>Blur>Motion Blur set Angle to 90 degrees and Distance to 66 pixels. After that move the blurred render under the normal render in Layers tab and you should have this now.
The wallpaper is almost finished now, all we have to do is make a little adjustments to it. Create a new Fill Layer (Layer>Fill Layer>Solid Color), put the mode on Exclusion and Opacity 75% click ok fill with #091329 and put the layer above all in Layer Tab.


Tutorial created by SpEEdyRoBy for www.DesignSphere.info
Download The Wallpaper Pack
Wide: 2560 x 1600, 1920 x 1200, 1680 x 1050, 1440 x 900
Full: 1600 x 1200, 1280 x 1024, 1024 x 768
HD: 2560×1440, 1920 x 1080
iPad, iPhone

1 Comment